
Sugar-Free Cream Cheese Mints
These are the cutest little sweet morsels that will bring back all the memories of cream cheese mints. They are also completely sugar-free, as I used Swerve confectioners’ sweetener. A little peppermint extract and some food coloring of your choice (optional) are all that is needed to finish it off. Super-easy, but it does take some patience with the chilling times.
Chef Tips:
- Use cold hands when working with items like these that rely on chilled temperatures for easier handling.
- Swerve is a great alternative to icing sugar, and I use it in many of my recipes. It is predominantly made from erythritol – a natural sweetener that has no effect on blood sugar for most people. I do not recommend the granulated type for this recipe.
- The butter must be completely softened to ensure it is mixed well with the remaining ingredients. This simply means leaving it at room temperature for many hours before using it.

Sugar-Free Cream Cheese Mints
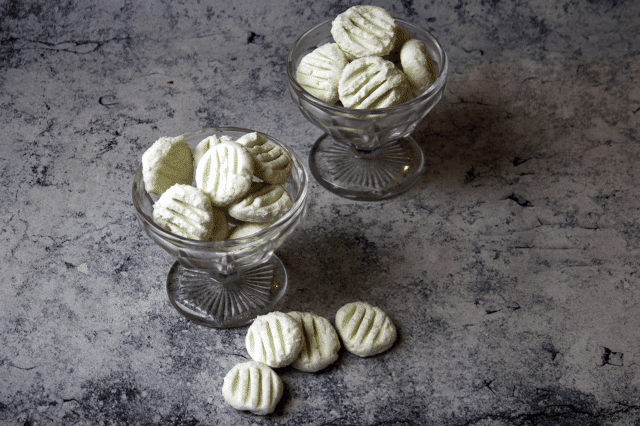
You only need a few ingredients to make these simple, old-fashioned cream cheese mints. These make the perfect little treats because they are sugar-free, low carb, and low calorie. You’ll love these guilt-free morsels!
Equipment
Ingredients
- 3.5 oz cream cheese
- 0.9 oz unsalted butter softened
- 5.3 oz Swerve confectioners’ sweetener
- A few drops peppermint extract
- A few drops food coloring optional
Instructions
- Combine the cream cheese and softened butter in a bowl.
- Gradually add the powdered sweetener until you have a firm mixture.
- Add a few drops of the peppermint extract, along with some food coloring (if using).
- Prepare a baking sheet lined with parchment paper. Use a teaspoon to take very small portions from the mixture (approx. 0.4 oz / 10 g each) and make little mounds on the tray. You should yield around 25 little mounds. Place the tray in the fridge for 25 minutes.
- After 25 minutes, they will be much easier to roll and shape as the butter would have started to solidify. Use cold hands to roll each one into a ball. If you find the last few sticks to your hands, return the tray to the fridge until the remaining pieces firm up again to make it easier to roll.
- Once they have all been rolled into smooth balls, use a fork to make indentations on the surface by gently pressing it across each piece.
- Return the tray to the fridge to firm up for at least another 30 minutes before enjoying – or pop them into a storage container and keep them in the freezer!


Nutrition
Serving: 1gCalories: 20kcalFat: 2gSaturated Fat: 1gCholesterol: 5mgSodium: 10mg
CLICK HERE to Pin this Recipe


Hi, my name is Kate.
I love food. Real food. We eat all of the things that nursing school taught me were bad for you: butter, eggs, bacon, and raw milk.
I am a Nurse, a Mom, and a Real Food loving blogger. Just trying to save the world.