

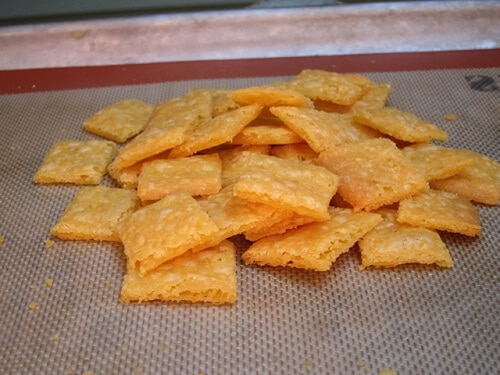
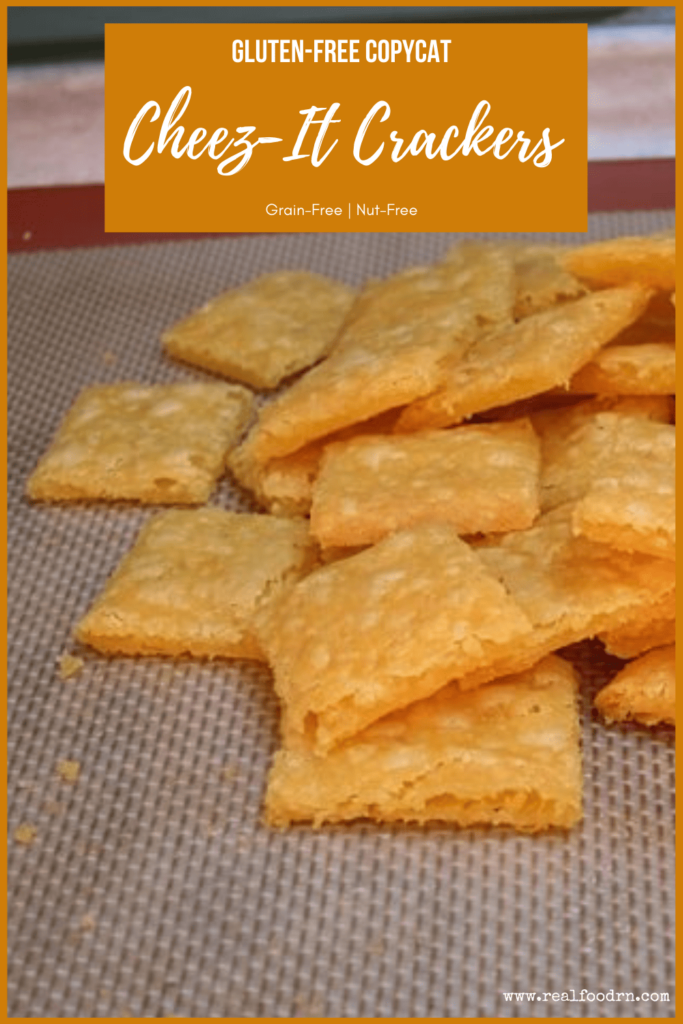
If you have ever tried a Cheez-it cracker, then you know. Oh yeah, you know. Only one is not an option….maybe only one box, but never only one cracker. I love the taste of them, the perfect salty snack. The only problem is that they are filled with garbage. About 30 minutes after eating them my symptoms set in — first a headache, then the stomach ache, and the next day is the skin eruption. Ah, gluten, you nasty little devil you. But sometimes I still crave that salty, cheesy, crunchy snack. So, I decided to come up with my own version! Gluten-free Cheez-it crackers. I bet you can’t eat just one!
First, here is the ingredient list of the “real” Cheez-it crackers (remember, the box says on the front “100% real cheese” — hmm): Enriched Flour (Wheat Flour, Niacin, Reduced Iron, Thiamin Mononitrate [Vitamin B1], Riboflavin [Vitamin B2], Folic Acid), Soybean and Palm Oil with TBHQ for Freshness, Skim Milk Cheese (Skim Milk, Whey Protein, Cheese Cultures, Salt, Enzymes, Annatto Extract for Color), Salt, Contains Two Percent or Less of Paprika, Yeast, Paprika Oleoresin for Color, Soy Lecithin. So basically you are eating wheat flour (gluten), some GMO seed oil, and junky CAFO cheese. Oh, and MSG. Ish, no thank you!
Here are the ingredients in mine…
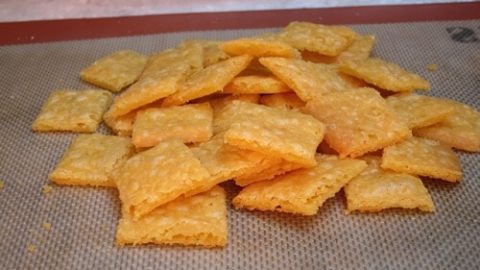
Gluten Free Cheez-It Crackers
Cheez-It crackers are the perfect salty snack. The only problem is that they are filled with garbage. Make your own from real food with just 5 ingredients!
Ingredients
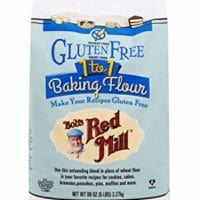
- 1 cup all-purpose gluten-free flour
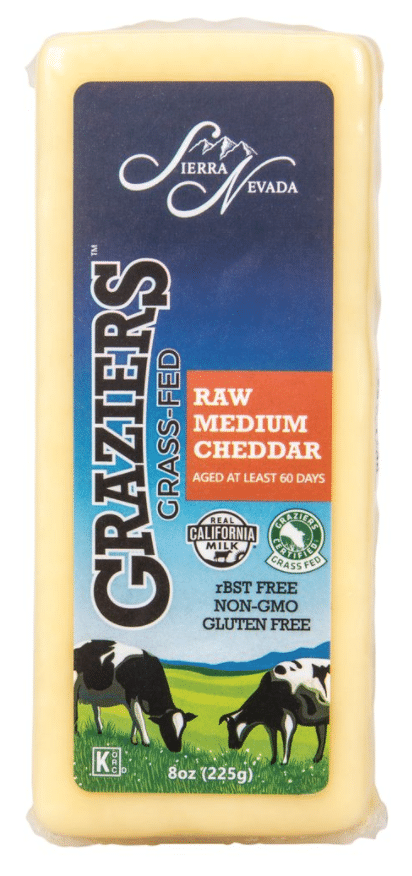
- 1 cup shredded extra-sharp cheddar cheese
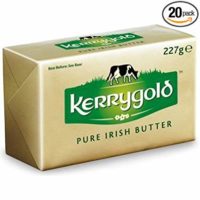
- 4 Tbsp cold grass-fed butter, cut into pieces
- 2 Tbsp cold water
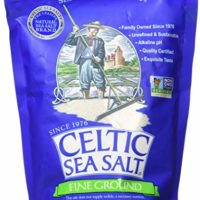
- Sea salt for sprinkling on top
Instructions
- Preheat oven to 350°F.
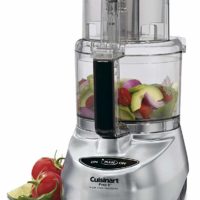
- In a food processor, combine flour, cheese, and butter.
- Pulse until its a crumbly texture, but well combined.

- Add water and process until a dough forms.
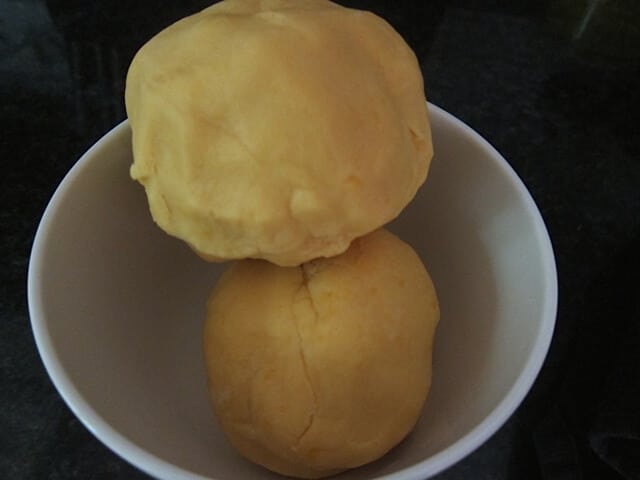
- Divide dough into two balls and chill for 15 minutes in the fridge, or until firm (not longer than 30 minutes).
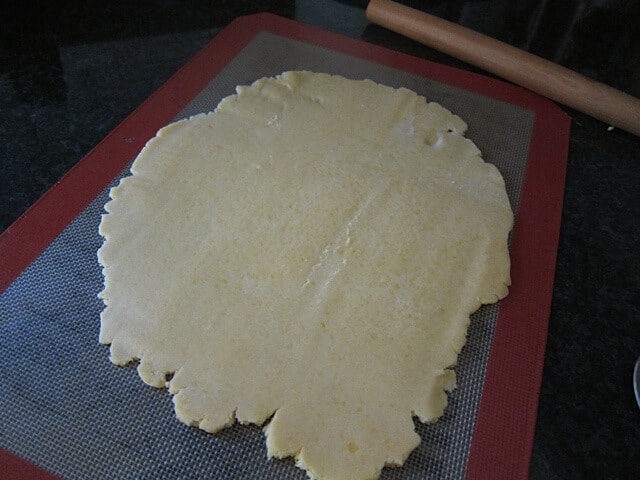
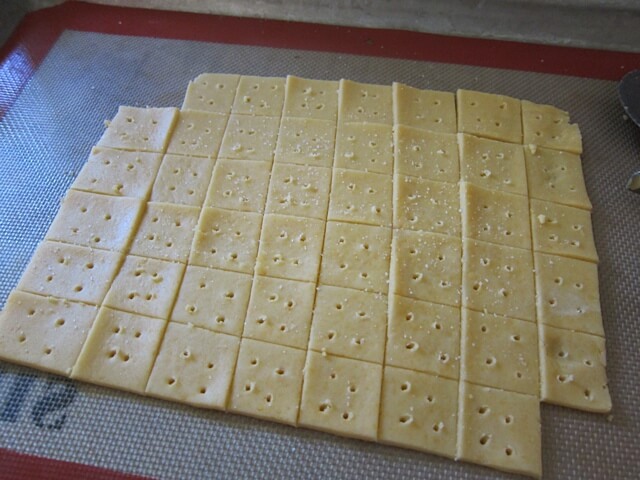
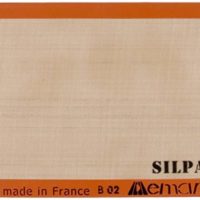
- Roll one ball out on a Silpat until about 1/4″ thick (I use Silpat because then you do not need to flour a surface and make a big mess).
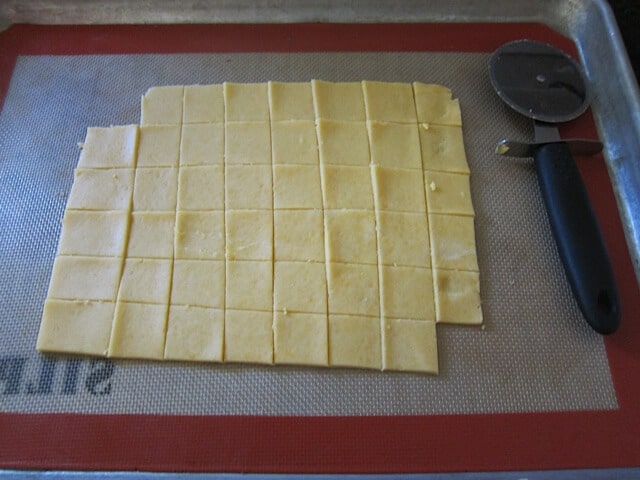
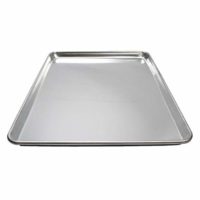
- Pick up Silpat and rolled out dough and place it on a baking sheet.
- Using a pizza cutter, cut dough into squares and trim off uneven edges (you can add extra dough to the next ball).
- Sprinkle with salt, lightly.
- If you want to, poke little holes in the top with a toothpick to make them look even more like Cheez-it crackers.
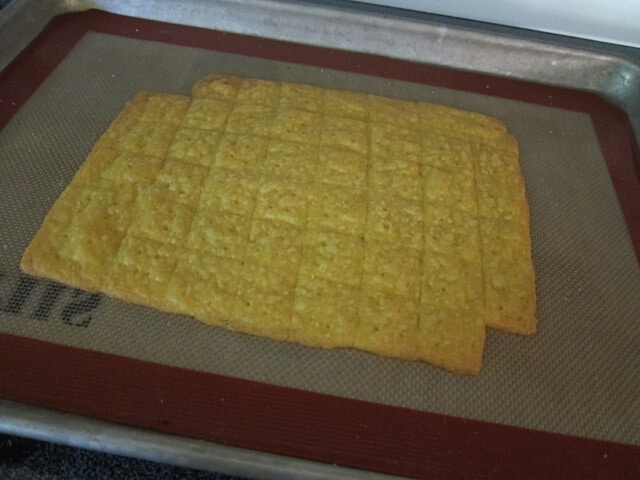
- Bake for 10-15 minutes or until they are bubbly and browning on the edges slightly (my daughter knows they are done when the kitchen smells like macaroni and cheese).
- Take out of the oven and recut the crackers with a pizza cutter, just trace the lines you made before.
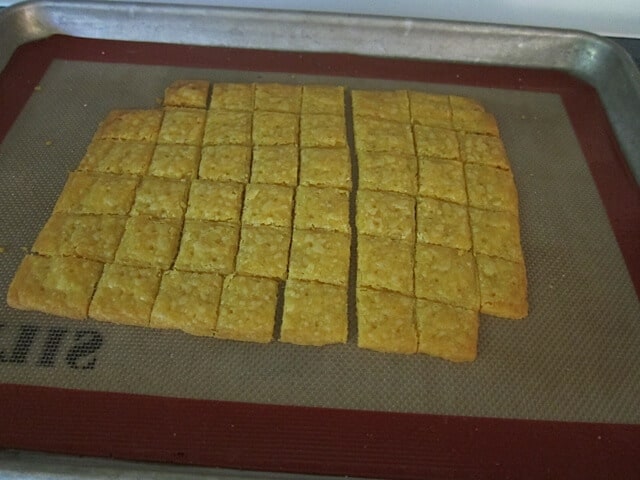
- Allow to cool completely before breaking them apart.
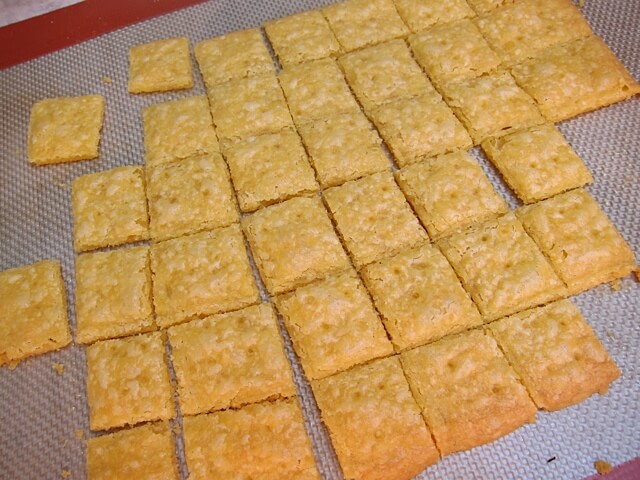
- Repeat with the second dough ball.
- I store them in a plastic bag in the fridge and they last up to one week.
UPDATE: reader tip: "Hi, love these and been making them for years (your recipe). When I had an epiphany…and quickly shaped the dough into one long cylinder and then I patted it on four sides to make one long square. Popped it in the fridge and 30 minutes later I sliced it just like you would with some cookie doughs and man oh man was that a cinch. No rolling pan or realizing or anything. Had to share!" ~ Melanie
Recommended Products
As an Amazon Associate and member of other affiliate programs, I earn from qualifying purchases.

P.S. If you want to find the best gluten-free items online (best prices around, believe me, I have checked!) with free shipping, I highly recommend Thrive Market, they even have a special Gluten Free section. CLICK HERE to check them out!
CLICK HERE to Pin this Recipe


96 Replies to “Gluten-Free Copycat Cheez-It Crackers”
Ooooh I can't wait to try this, I have been waiting ever since I saw those pictures! Yummy yum yum!
What are the ingredients in the glutenfree flour? I use part almond part coconut part flax will that work as well?
Did that work and how much of each
Kate, what are the ingredients in the flour? And can almond flour be subbed? Thanks in advance!
If you click on the link and look at the description it gives ingredients. I think tapioca, rice flour, potato starch and cellulose.
Why, oh why am I just seeing this recipe now!!!??? Agh! Thank God for your newsletter and those little reminders of “interesting” recipes! My kids loooooooooooooove cheez-its and I’ve not been able to find a substitute for them…UNTIL NOW!!! So excited to make these this weekend and see if they pass the kid test! I’m sure they will since they are so cheesy (Marley is a cheese freak)! Thank you for all your hard work, Kate 🙂
Why do you love the Gluten Free Flour blend by Living Now? I am searching for a great All Purpose Gluten Free blend and am wondering why you love & use it!! thanks
I was actually doing some product testing for them and my recipes were turning out great. So, being that I don’t really use a lot of grains/gluten-free stuff in my recipes this flour was really one of very few that I have ever used. We try to stick to whole food recipes and only use the gluten free flours in treats. They can still be highly processed and hard on our bodies.
Thank you so much! These were cheesy and crunchy! I will definitely make again! I even made crackers without cheese and used an extra TBL of butter in them, not bad!
Glad you liked them!
what temperature should they be baked at?
350 degrees F
This looks great but the GF AP Flour you are recommending is outrageously priced for 17 ounces. People, make your own GF AP flour. The recipes are everywhere to be found.
I just made these tonight, they were amazing. They are better than store bought and were supper easy. They baked up so airy and crispy, thanks so much for the recipe!
Glad you liked them Brandy! They last on average about 1 day in our house. Yum!
Just got finished making a batch of these…absolutely delish, however I found in order to get them as crunchy as the original cracker I had to cook at least 15 mins. Then recut and distributed them around the pan (not touching) and popped them back into the oven for 3 mins. Also on the second batch I rolled then
much thinner (1/8 in.). Tasted superb and I’m not even gluten intolerant! used small canapé fork to make holes. Used Cup 4 Cup gluten free flour.
Could this be made with dairy free cheese and dairy free butter (like Earth Balance)?
Has anyone ever tried that?
Thank you!
You could certainly try them, but I don’t think they would taste near as good. The cheese is what really gives them the cheddar flavor.
Hi Kate. These sound delicious. I’m just trying to clarify the amount of cheese you’re calling for. You say 2 cups (8 ounces) but 8 ounces is one cup. Can you just clarify? Thanks!
Hey Jodi, good catch! My bad calculation, I fixed it. I’m surprised no-one caught that until now. 🙂
Kate, I think you were correct – 8 oz is a weight and when it is shredded it probably is 2 cups which is a measurement.
That is so funny that you fixed it. I just went back to look at the recipe and the (8 ounces) was gone. I thought maybe I had imagined it! Anyway, they’re in the oven and I can’t wait to taste them!
I just made them with Robin Hood all purpose gluten free flour and old cheddar cheese because I didn’t have extra sharp. I thought it would be an ok substitute but I was sadly mistaken. Gave to my three year old (who is the real taste tester) and he was less than impressed…He spit them out into garbage. ..and be is usually all for anything crunchy. I may try them again with extra sharp cheese and different flour but not any time soon. Very gritty:(
Amazing. Just took my first bite and it was heaven. I used Glutino GF flour and sharp cheddar. was so exited I forgot to divide and put in the fridge. So I cooked them 35 minutes. Yummy.
Awesome Jan! They sure go fast in my house!
I made them today and my, were the delicious!!!!!! Everyone in my house could NOT believe they were the regular kind. I used the white cheddar cause I like the flavor more but they tasted exactly like the real Cheez-Its. Thank you so much for this recipe!!!! Will need to make double batch next time as they are gone quickly!
Yeah double up and hide half the batch. That’s what I do to make them last longer 😉
Delicious! I usually try to avoid gluten free flour mixes, but have been meaning to try this w a bag of bobs red mill someone got me. Finally got around to it today and they are so good! Very happy I only made a half batch, because they are addictive! In my opinion even yummier that the “real” thing
Awesome! Yeah, they don’t last long when I make them either. Totally addicted!
Have you or anyone tried to freeze the second dough ball so that you can thaw it later in the week for a fresh batch?
Does storing them in the fridge not make them soggy? Sounds good though must try
They have to be refrigerated or they will mold pretty fast and go bad. They do change texture a bit, but allowing them to come to room temp brings them back
My dough was crumbly, what did I do wrong?
Maybe your cheese is lower moisture? Try adding a little more water
Just made these today. I haven’t had a Really good GF cheers e cracker in over five years. These were absolutely wonderful and easy to do. Thanks
So glad you liked them Karen! A batch only lasts about 1 day in our house. They are always a hit! 🙂
Can you use regular butter with no problem?
Sure!
Where and what product is your food processor?
I have this one: https://amzn.to/29DmXot
I’m glad you said how your daughter says the kitchen smells like “macaroni and cheese”. That helped me out! Wow, what great crackers.
Glad you liked them Sharon 🙂
These look perfectly delicious! I’m planning to make them tonight, but I haven’t used a pizza cutter on my Silpat before – will it cause damage?
I have a plastic pizza cutter now, that is “duller” and I push very lightly when I cut
I find that the gluten free flour mixes are not always grain free which I am also doing. They can have rice flour and/or potato flour, sourgum (sp), etc. I have a grain free all purpose baking mix that only has almond flour, golden flaxseed meal, coconut flour, baking soda and psyllium husk powder, can this be substituted for or possibly used with some of the other gluten free flours in your mix? Or possibly would it work using just one flour? I think I may have seen that question here but it was not answered. Kind of leaves me to assume “no,” when there’s no response.
Sure, you could certainly try that one. The crackers might be more dense though. Let me know how they turn out!
My son was just diagnosed with celiac. It’s been a rough two weeks for him discovering things he can and cannot eat… Sometimes heartbreaking. The thing he missed the most… Out of everything were cheese-its!! He literally broke down in tears when I told him he couldn’t have cheese-its. Thank you, thank you, thank you a million times for this recipe. It brought a smile to my baby’s face, and it’s super easy for this mama to make!
Aw, that brought tears to my eyes! I am so glad he found an alternative, and I hope he likes them! Hang in there Mama. You might want to pick up a copy of this book too: https://amzn.to/2ef2zea. Also, have your heard of the GAPS diet? Very healing for the gut, here is the protocol guide: https://amzn.to/2eyTcJp 🙂
I was. Hoping to find that you had come up with one where you had used a dairy free cheese as well as had made it gluten free. I love these things. Any ideas on how I can find a recipe or develope my own?
I just made these tonight. I used 3/4 cup almond flour and 1/4 cup coconut flour in stead of the alpurpose gf flour in the recipe. I also used Balderson 5 year aged white cheddar. They turned out so light and flakey, totally amazing. I definitely will be making these again!!
Oh thanks for letting me know Shannon! It’s always good to know some recipe variations that work so I can share with others. Your variation sounds like a delicious cheesy almond cracker that I love (we buy them from the store)
These are not really considered whole, real foods though, correct? Because that flour is definitely not considered a whole food ingredient. Can you substitute with white whole wheat flour? King Arthurs? That is a 100% real food ingredient.
We don’t eat gluten, so I never use wheat flour. Its very hard on our digestive systems.
Okay, so then you wouldn’t know the answer about using whole wheat? Because the flour in your recipe is very unhealthy.
Thank you for this recipe. It’s just great for helping me get healthy again.
Do you have a bread recipe using this flour blend?
I don’t, but there are tons of recipes out there
These are so addicting, I had to hold myself back from eating all of them.
I used the cheese I had on hand which was Italian, but I can see how a sharp cheddar would work even better.
I did have to make a few adjustments.–Added almost 2 more tablespoons of water so that the dough would come together. I also made sure the dough was thinner by pressing it down with my fingers. I then cut up my 2nd batch into four as the edges crisp up more, and I baked them a little longer. I might try them with coconut oil instead of butter next time. (Less guilt.)
My boys loved them. I’ll definitely be making them again.
PS. Aldi’s all purpose gluten free flour works well.
Hi Lorna, I know they are SO addicting. I have to hide them…..from myself. lol. Glad your boys loved them too 🙂
These are so addicting, I had to hold myself back from eating all of them.
I used the cheese I had on hand which was Italian, but I can see how a sharp cheddar would work even better.
I did have to make a few adjustments.–Added almost 2 more tablespoons of water so that the dough would come together. I also made sure the dough was thinner by pressing it down with my fingers. I then cut up my 2nd batch into four as the edges crisp up more, and I baked them a little longer. I might try them with coconut oil instead of butter next time. (Less guilt.)
My boys loved them. I’ll definitely be making them again.
PS. Aldi’s all purpose gluten free flour works well.
They are so addicting! Glad you guys are enjoying them 🙂
I do not own a food processor. Could I use my kitchen aid mixer?
Whatever gets it to a dough consistency
I tried this recipe yesterday, and they were finished within a matter of minutes lol. Planning to make them again today. My food processor was playing up, so I whisked it manually. Thanks, Kate! They are super addictive, whilst being healthy.
Yeah they don’t last long in our house either! Glad you like them 🙂
Made these today… absolutely devine & easy to make. Thanks for this sharing
So glad you like them Haseena!
I just found out my daughter has a gluten intolerance a few months ago, and it’s been really hard restricting her from all her favorite snacks. Came across your recipe and had to try it out! These came out amazing and my daughter loved them! Thank you!
P.S. I don’t see monosodium glutamate (MSG) anywhere on cheez-it’s ingredient list. In comparison to other popular snacks in stores, it generally has less modified/harmful ingredients than most. Where are are you getting this ingredient info? If you are correct, I’d like to cut out cheez-it’s completely!
So glad you liked them! Many companies are removing MSGH, thankfully, but it also hides under different names: yeast extract, etc.
Can almond flournbe substituted for the gluten free flour?
it will not make a 1:1 sub, almond flour is much more dense. You might want to try something lighter along with the almond flour, like coconut flour or arrowroot powder.
What flour blend did you use for this recipe? I can’t get the link in your list to work. Thank you in advamce.
Sorry about that, here’s a link: https://amzn.to/31r8F2w
Can these be frozen?
I haven’t tried it, but I think they would do okay
Have you tried this gluten or vegan? I need Gluten Free and Dairy Free. I am a fan of Cheeze It crackers. Any thoughts that will help me. Thanks
I’m not sure how to make them dairy free, you might try one of the dairy free cheeses out there, but the texture might be different. Let me know if you figure something out.
Hi, love these and been making them for years (your recipe). When I had an epiphany…and quickly shaped the dough into one long cylinder and then I patted it on four sides to make one long square. Popped it in the fridge and 30 minutes later I sliced it just like you would with some cookie doughs and man oh man was that a cinch. No rolling pan or realizing or anything. Had to share!
That. Is. Brilliant!! I am going to edit the post to include your tip. Thank you!!