
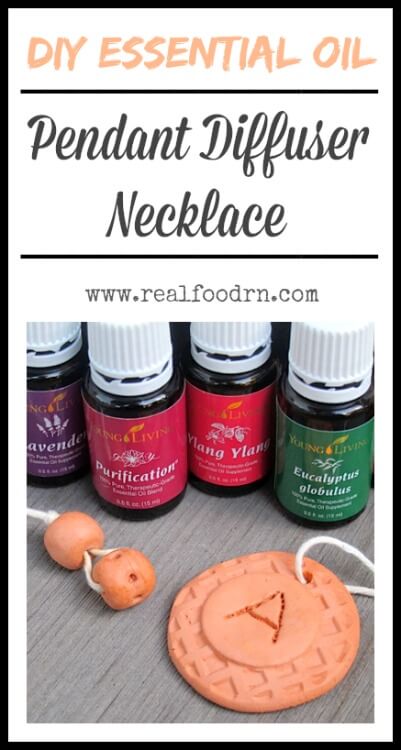
DIY Essential Oil Pendant Diffuser Necklace
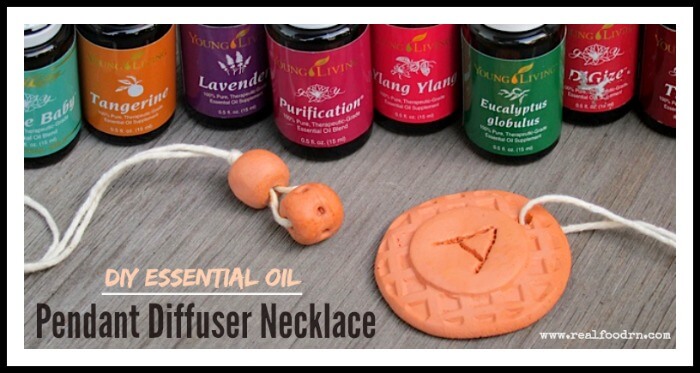
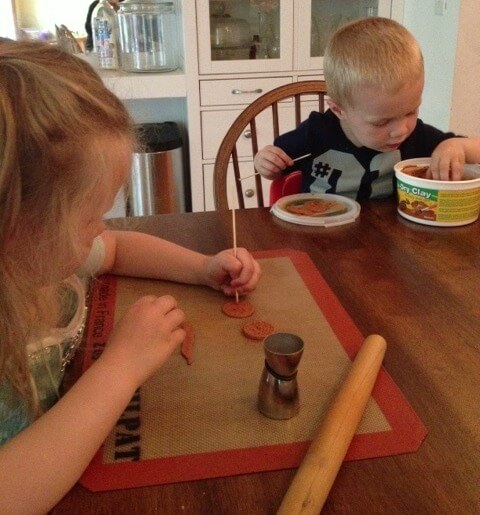
I have been shopping around for the perfect essential oil pendant diffuser necklace for some time now. When I finally found the perfect one, wouldn’t ya know it, they were sold out! I kept checking back, but boy these are popular! So, I decided to try making my own. For a fraction of the cost of one necklace, I am able to make a ton of them at home. Plus, my kids are obsessed with helping me make them!
The great part about these necklaces is that you do not need to carry your oils around with you all day. The scent lasts for hours and whenever you need an extra boost, just put it up to your nose and take a deep inhale. Your body heat keeps it constantly emitting a nice aroma. Kids can wear them to school too, my daughter loves to wear Joy on her necklace!
Pendant Diffuser Necklace How-to:
What you need:
- Terra Cotta Air Dry Clay — where to find
- Silpat — where to find (makes any surface non-stick!)
- Rolling pin (I find this kind to be the easiest to use)
- Cookie cutters, small ones about the size of a silver dollar
- Stampers — like these
- 1 Skewer Stick
- String, leather strips or necklace chain
Directions:
- On your Silpat, roll out a ball of clay using your rolling pin
- Roll the clay until it is 1/3″ thick, if they are too thin they become brittle when dry
- Using your cookie cutters, cut into circles or fun shapes
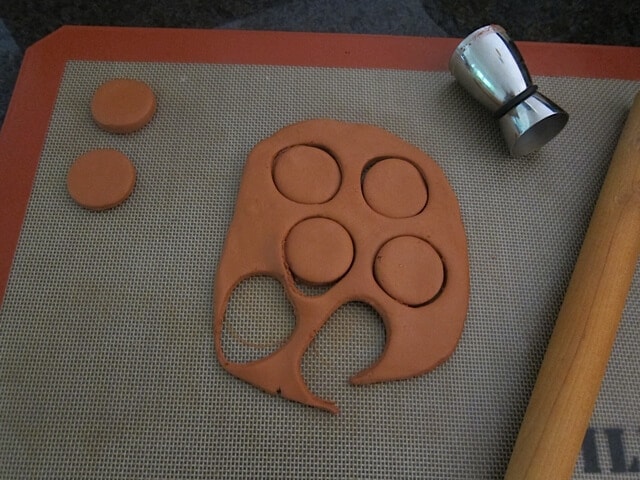

- Using stampers, make pretty impressions into your pendant — careful not to press too hard, you just want a light impression. My kids love to help with this part!
- Using your skewer stick, poke a small hole in the top for your necklace string
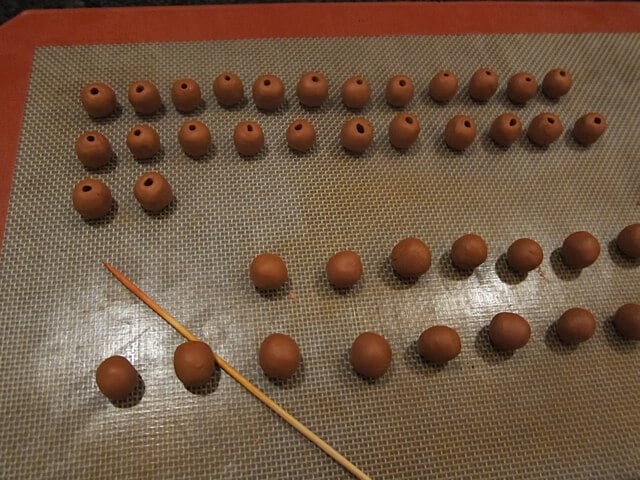
- To make the beads, just roll clay into balls and poke holes through them

- Allow to dry, undisturbed, for 2-3 days. If you try to use them earlier, they will break — believe me we learned this lesson over and over (my kids were way too excited to wait 2 days!)
- Once completely dried, put your string of choice on them to wear as a necklace

How to use:
- Add your oils of choice by dropping a few drops onto the pendant and waiting about 30 seconds until it soaks in
- When applying the essential oil to your pendant, lay it down flat on a table so it does not drip all over
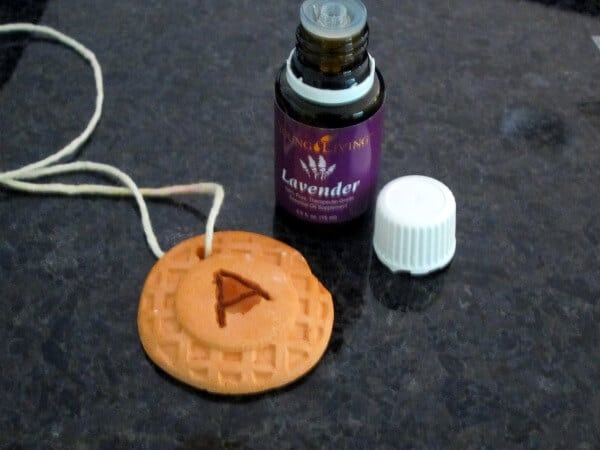
- Make sure the oil is fully absorbed into the terra cotta before using so it won’t stain clothing
- The scent lasts for hours!
- You can also hang them on your car, on lamps on your bedside table, anywhere that needs a little extra scent
Note: do not let these pendants get really wet (ex: wearing swimming or leaving outside on the sandbox ledge while its raining — they will get mushy, again another lesson learned). They will also crack if thrown at someone or stepped on, not that my kids did that or anything.
CLICK HERE to Pin this Post

Hi, my name is Kate.
I love food. Real food. We eat all of the things that nursing school taught me were bad for you: butter, eggs, bacon, and raw milk.
I am a Nurse, a Mom, and a Real Food loving blogger. Just trying to save the world.
Can I just share with you how awesome you are for doing this?
Thank you! It is a really fun project that I do with the kiddos 🙂 Love it when I can include them in my blog posts and recipes once in a while.
What about a shard from an unglazed terra cotta pot? I am going to try it.
Great idea! Just make sure to file any sharp edges 🙂
Is Terra cotta the only thing you can use – aren't some of the air dry "sculpting clays," or others, also porous?
I am sure they would also work just fine. I went with the Terra Cotta because it was inexpensive and I got it online delivered to my door 🙂
Thank you, thank you, thank you! I wanted to make some but wasn’t sure if air dry clay (or oven bake) would work. I’m headed off to Hobby Lobby right now with a coupon :). Just in time for Saturday’s farmers market!
I am curious…will the oil totally disappear or do you need a different necklace for each scent? For my birthday I got a beautiful glass bulb one(https://pixieglassworks.com/pages/collections) that you fill up along with some local essential oil(not up to YL standards but as good as I can get at the moment). It is beautiful but I need a 25 gauge syringe and isopropol to remove old oil or to change the scent…PAIN!
The oil fades over time. I find that I can apply about two different oils each day, if I separate them a few hours apart. I typically stick to one oil per day though 🙂
Can you please describe how you put the necklace together. I’m crafty challenged.
Just thread your ribbon through the pendant and then through a bead if you wish. It’s really up to you and how you want your necklace to look 🙂
Love my necklace to begin with, but even more now that I have learned your kiddos helped make it!!!! AWESOME:)
Aw, thanks! I love to involve them in my blog posts. They think its really fun 🙂 Especially when they see their pictures on Mommy’s computer!
I tried making these with another brand of air-dry clay and they just won’t roll out or cut smoothly, and then I stumbled upon your page. Your pendants look beautiful and smooth! I’ll try the clay you recommend, but what kind of cookie cutter is that in your picture – your cut edges come out so clean!
Jeri, ha, you will laugh at me….it’s a shot glass that I grabbed from my husbands bar room. One of those metal ones that you use to measure alcohol to put into drinks, the kind bar tenders use. It makes a nice clean edge for my necklaces and its also a nice size. Like this –> https://amzn.to/1JxX0mU
That IS funny – I thought it looked like something from a bar 😉 Thanks!
Love these. Are the brown ones from the same clay? I love the color of those.
No, its a different air dry clay that I found at the craft store 🙂
Awesome! Thank you so much for sharing. I’m excited to try this. =)
Hi! I use high quality oils and they break down petrochemicals because they are toxins. I would think that the essential oils would break down the polymer clay, since it’s a petroleum product.
I have not had any issues with the oils breaking them down
Hello, I just came across this because I just made some necklaces out of air dry terra cotta and white air dry clay. It’s been a little over 24 hours and they seem dry but are very chalky. It’s coming off on clothes. Any suggestions??
A friend of mine coats hers in a glaze
Any chance I could bake them?I also used the crayola brand in terracotta, and even after months they would crumble and come off on hands,clothes etc.Was thinking to bake them at 170,as I don’t wanna put such thing in my dehydrator.Any ideas?
I have never baked air dry clay before, so I can’t speak to that. You could try making the ornament dough that you see on Pinterest and baking those!