
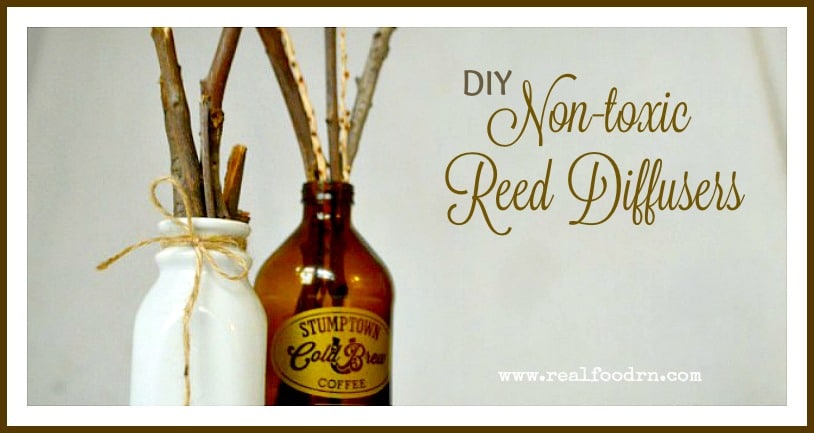
Non-toxic DIY Reed Diffusers
Today I give you a post created by Melissa over at My Darla Clementine. Love this idea, what a great way to keep your home smelling amazing without using toxic candles or chemical air fresheners!
Before I started making the conversion to a more natural and non-toxic household, I was a serious scented-home-goods snob. I loved a great smelling candle, hand soap, room spray, fill in the blank (though I was very picky about the fragrance!).
More recently, though, our family has really tried to break our attachment to unnecessary toxins and chemicals, especially ones that are associated with potentially harmful artificial fragrances. Thankfully, I’ve happened upon great DIY recipes and safer ways to enjoy wonderful smells at home (and you can check out my posts on how to make scented hand soap and beeswax candles for a couple of examples).
Today I am going to share with you how I make non-toxic DIY reed diffusers
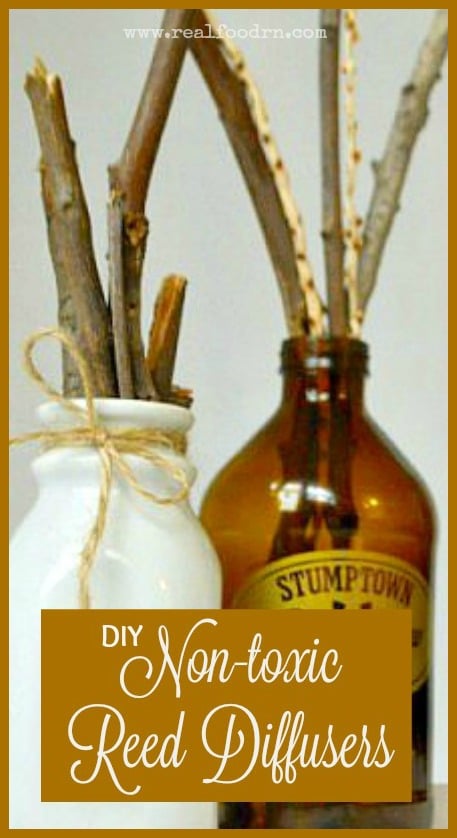
I suppose I should really call them “twig diffusers” since twigs are my wood of choice (though you could use reeds if you don’t mind paying for them as long as you get actual reeds that have cuts to facilitate the transfer of fragrance, unlike bamboo skewers which aren’t very good at spreading scents around).
I like to use natural twigs and sticks, though, for their rustic look, and the fact that they are free and naturally possess the ability to draw liquid through themselves. Besides, using twigs is a fun way to get my toddlers involved by recruiting them to find some for me while we play outside.
What you will need:
- Natural twigs or reeds
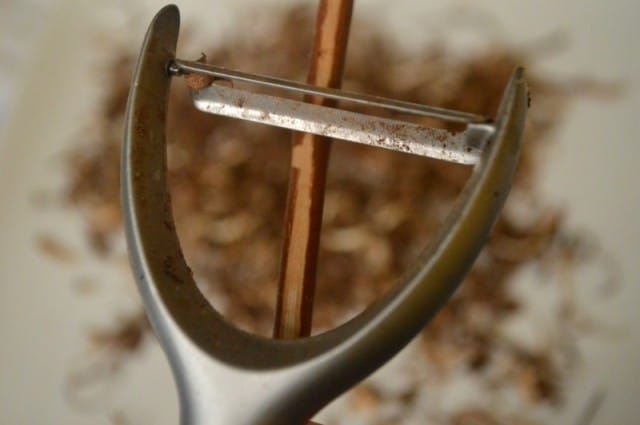
- Vegetable peeler & baking sheet if using twigs
- Glass or ceramic vase/jar with a small opening
- Carrier oil (I suggest Sweet Almond Oil, read more below about why) — where to find
- Essential oils of choice (quite a bit is needed for this recipe, so I would suggest avoiding oils like sandalwood or neroli for this type of project, and instead choosing high-quality but less pricey options like lavender, cedarwood, sweet orange, fir needle, cinnamon leaf, etc)
Directions:
- If using natural twigs, the first thing you will want to do is bake them. This action benefits your project in a couple of ways; it will help kill any bugs or germs that may be lurking, and it will also dry out the sticks, making them more effective at soaking up the essential oils
- Spread them out on a baking sheet and place in a heated oven at 200°F for 45 min – 1 hr
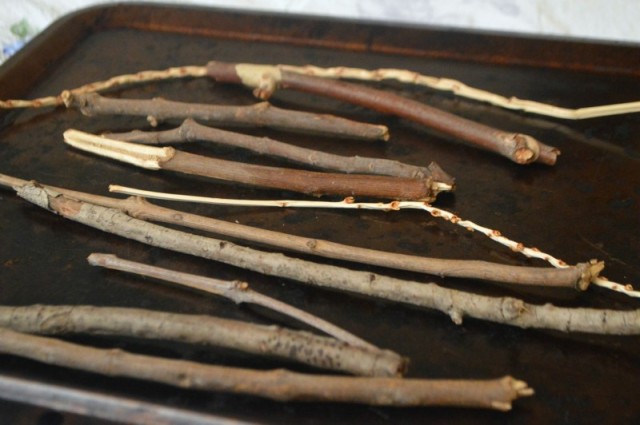
- After the twigs have cooled, peel the bark off using a vegetable peeler
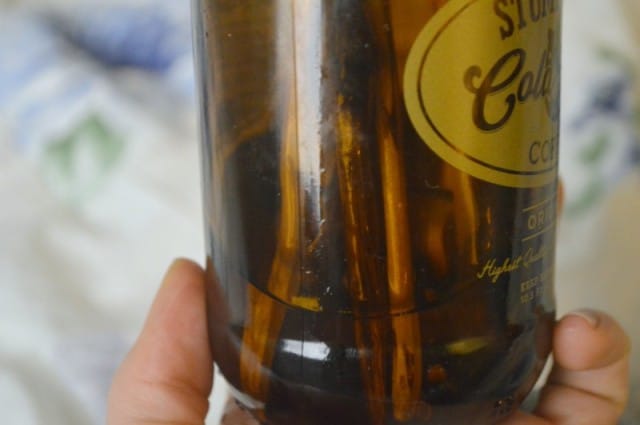
- Next, prepare your bottles and liquid
- There are a few different mixtures you can use effectively, but some of them contain things like mineral oil (petroleum-derived) or isopropyl alcohol (which I don’t consider to be all that natural or non-toxic). And besides, alcohol mixtures evaporate much quicker, meaning you will be refilling your diffuser more often. With all of that in mind, I have chosen to keep my diffusers going with very safe and natural oil-based solutions
- Pour a carrier oil of choice into your jar or vase, followed by essential oils of choice. I recommend using sweet almond oil as it is virtually scentless and is light enough to travel through the reeds or twigs. Jojoba and olive oil are a bit heavier and might not do so well

- You will need about 2 fluid ounces (1/4 cup) of carrier oil to 6 tsp (or 300 drops) of essential oils. This sounds like an enormous amount, I know! Having this 4-1 or 80%-20% ratio is really important, though, to actually get enough of the scents to make a difference when they travel through the twigs and disperses into the air. Give your bottle a swirl to combine.
- Add as many dried/peeled twigs into your jar as you can comfortably fit into the opening. The less of an opening/gap you have left, the slower the oils will evaporate, meaning the longer you will get out of your diffuser.
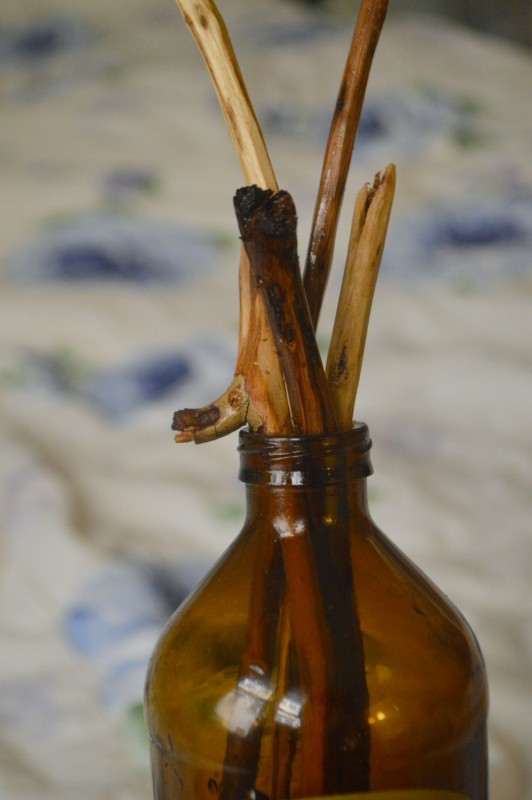
- After 10-15 minutes, flip your twigs so that the soaked end is now sticking up ad spreading goodness all around! Enjoy!
Maintenance:
- Every few days you will want to flip the twigs around to release more fragrance. When scent diminishes completely, you can top the same mix off with more essential oils to refresh. Once the twigs have become fully saturated with oils, they will no longer be able to facilitate the oil travel and will need to be replaced
Want to make it a gift?
- Prep the twigs and oil mixture, storing the liquid in an air-tight container. Wrap the separate items (vase, liquid, twigs) and include instructions on how to assemble and maintain. As an added bonus, be sure to add this free printable Christmas card in!
CLICK HERE to Pin this Post

Melissa Coleman blogs about DIY Living, Natural Parenting, and green Health & Beauty at My Darla Clementine. She is a licensed esthetician, real food lover, avid thrifter, and overall creative Mama Bear living in LA with her husband and daughters, Clementine and Darla. Follow their adventures and tutorials for inspiration on being healthy, conscious, and creative! Melissa can also be found on Instagram, Facebook, Pinterest, and Twitter.

Hi, my name is Kate.
I love food. Real food. We eat all of the things that nursing school taught me were bad for you: butter, eggs, bacon, and raw milk.
I am a Nurse, a Mom, and a Real Food loving blogger. Just trying to save the world.
OMG!! What a fabulous idea!! I need to do this ASAP to use my essential oils.
Helo mellisa, m really impressed nd would definitely give it a go.. but I wanna know if I can use sesame oil or coconut oil instead of almond oil becoz these oil are cheaper in price and sandal wood as the sticks.
The sesame oil might give off a scent of its own, but I would think that coconut carrier oil would work. Something like this: https://amzn.to/28one6e
Hi there, they are lovely! Could I ‘bake’ the twigs in a microwave? Electricity & gas are very expensive in my country! Also, could I use Castor oil instead?
Sure and sure! 🙂
Would this work with driftwood?
Sure!
Omg this is brilliant and I can’t wait to try this!! Thank you! I’ll use twigs from a Juniper Tree!